


subscribe to our Newsletter
How Do I Install Crown Molding?


Crown molding adds a touch of elegance and sophistication to any room, transforming plain walls into works of architectural art. While the idea of installing crown molding might seem daunting at first, with the right tools and a step-by-step approach, it's a DIY project that can be tackled by anyone with a bit of patience.
In this guide, we'll walk you through the process of installing crown molding to enhance the beauty of your home.
Materials and Tools:
Before diving into the installation process, gather the necessary materials and tools:
Materials:
- Crown molding
- Paint or finish
- Wood putty
Tools:
- Miter saw
- Coping saw
- Nail gun or hammer and finishing nails
- Level
- Tape measure
- Carpenter's pencil
- Sandpaper
Step 1: Measure and Plan
Begin by measuring the length of each wall where you plan to install crown molding. Take note of any corners, as these will require precise cuts. Plan the layout, considering the type and size of crown molding you've chosen. Mark the starting and ending points of each piece on the walls.
Step 2: Cut the Corners
Crown molding is typically installed at an angle, and cutting precise corners is crucial for a professional-looking finish. Use a miter saw to cut the corners at a 45-degree angle. For inside corners, use a coping saw to remove excess material, ensuring a snug fit.
Step 3: Paint or Finish
The Molding It's easier to paint or finish the molding before installation. Lay the molding on a flat surface and apply the desired finish. Allow it to dry completely before moving on to the next step.
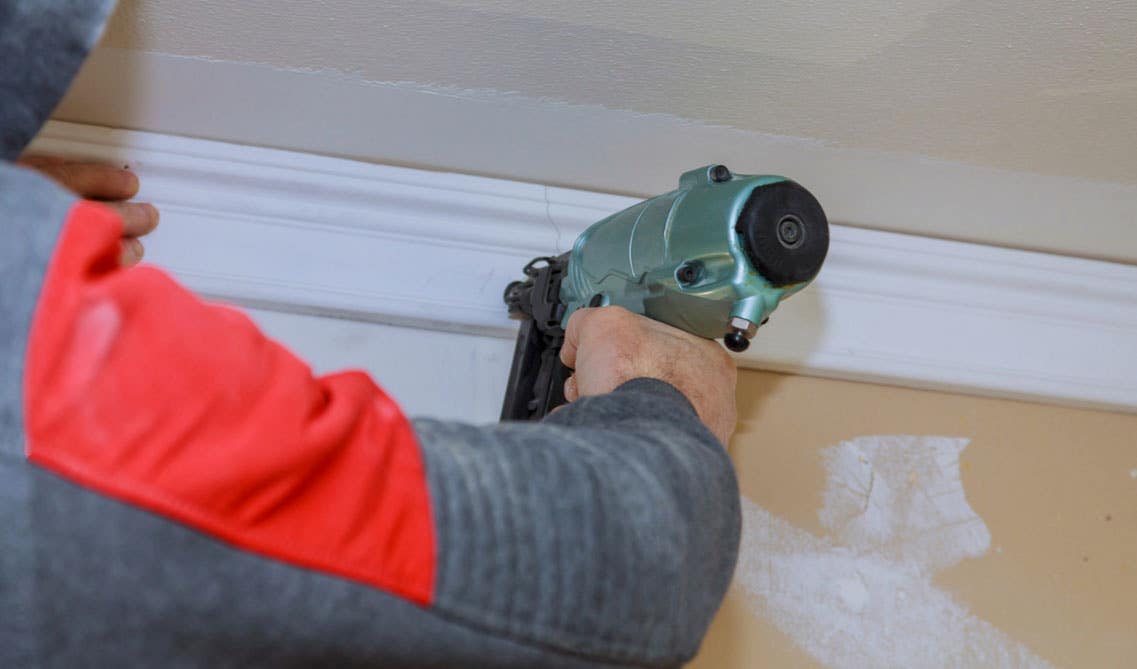
Step 4: Install the First Piece
Start with the longest wall and secure the first piece of crown molding using a nail gun or finishing nails. Make sure it is level and aligns with your marked points.
Step 5: Continue Installation
Work your way around the room, installing each piece of crown molding one at a time. Remember to cut precise angles for corners and use the coping saw where necessary. Secure the molding with nails spaced evenly along its length.
Step 6: Fill Gaps and Sand After installing all the pieces
Fill any gaps or nail holes with wood putty. Once the putty dries, sand the crown molding to achieve a smooth, seamless finish.
Step 7: Touch Up and Enjoy
Touch up any areas that may need additional paint or finish. Stand back and admire your handiwork – you've successfully installed crown molding, adding a touch of class and style to your home.
Installing crown molding may seem like a challenging task, but with the right tools and a systematic approach, it's a DIY project that can be accomplished by enthusiasts of all skill levels. Following these steps, you can transform your living space into a more elegant and visually appealing environment. Now, sit back and enjoy the fruits of your labor as you bask in the beauty of your newly adorned walls.

3D Kitchen Visualizer Tool
Bring your dream kitchen to life with our free kitchen visualizer!
Design NowOur cabinetry is designed with your family in mind so shopping at Lily Ann Cabinets is a decision you won't regret. As a trusted family brand, we prioritize your satisfaction and offer an unmatched shopping experience. Our commitment is evident through our dedication to customer service, including FREE samples and FREE 3D designs. We're here to make your kitchen or bathroom renovation as smooth and enjoyable as possible. Join our family and experience the Lily Ann Cabinets difference today!
Related Blogs:
- 11 Kitchen Cabinet Crown Molding Ideas For Your Kitchen
- 37 Paint Color Ideas For Kitchen Walls and Cabinets
- 15 Kitchen Countertop Ideas + Design Trends That Can Truly Revamp Your Kitchen
- 12 Kitchen Drawer Organizers, Trays, and Dividers for a Tidy Space
- 24 Stylish Brick Backsplash to Transform any Kitchen
FAQs
1. How much does it cost to have someone install crown molding?
On average, it's about $4 - $23 per linear foot.
2. Do you glue or nail crown molding?
You will want an adhesive and a nail gun to attach the molding to the wall.
3. What is the angle for joining crown molding?
The angle for joining crown molding is 45 degrees.
Shop Related Cabinet Lines
Recent Blogs

Kitchen Decor
What Your Wife Really Wants for Mothers Day

Kitchen Cabinets,Wood Cabinets,Cabinet Tips,Cab...
Laminate vs. Wood Cabinets: Choosing the Best Material for Your Needs


25+ Ways To Style Grey Kitchen Cabinets August 1, 2019
18 Unique Modern Bathroom Ideas | Cabinets, Vanities + More October 22, 2019
11 Fresh Kitchen Backsplash Ideas for White Cabinets March 5, 2020
What Your Wife Really Wants for Mothers Day April 25, 2024
Why You Should Embrace a Solid Slab Backsplash April 4, 2024


Comments