


subscribe to our Newsletter
Revitalize Your Kitchen: The Ultimate Guide to Refinishing Kitchen Cabinets


Kitchen cabinets play a vital role in your kitchen's overall aesthetics and functionality. Over time, though, their appearance can fade, leaving your kitchen looking dull and outdated. But before you consider replacing them, have you ever thought about refinishing them? Refinishing your kitchen cabinets is a cost-effective and transformative way to breathe new life into your kitchen.
In this step-by-step guide, we'll take you through the process of refinishing your kitchen cabinets, helping you achieve a fresh and stylish look without breaking the bank.
What Does it Mean to Refinish Kitchen Cabinets?

Refinishing kitchen cabinets refers to the process of restoring and renewing the appearance of existing cabinets by applying new finishes, such as paint or stain. It involves removing the old finish, repairing any damage, sanding the surfaces, applying primer, and then applying the desired paint or stain. The goal of refinishing is to transform the cabinets' appearance, giving them a fresh, updated look while preserving their structural integrity.
The process of refinishing can vary depending on factors such as the current condition of the cabinets, the desired finish, and the materials used. Some cabinets may require more extensive repairs and preparation, while others may only need light sanding and a new coat of paint or stain.
Refinishing kitchen cabinets offers several advantages. Firstly, it is a cost-effective alternative to completely replacing cabinets, which can be quite expensive. Refinishing allows you to achieve a new look without the hefty price tag. Secondly, it gives you the opportunity to customize your cabinets according to your style preferences. You can choose from a wide range of colors, finishes, and textures to match your kitchen's overall aesthetic. Lastly, refinishing extends the life of your cabinets by protecting them from wear and tear, moisture, and other environmental factors.
Related: Comparing Kitchen Cabinet Options: Refinish, Reface Or Replace?
The Steps To Refinish Kitchen Cabinets
Step 1: Plan and Prepare

Before diving into the refinishing process, it's crucial to plan and gather the necessary tools and materials. Consider the look you want to achieve and decide on the color, finish, and style that best suits your kitchen's theme. Once you have a vision in mind, gather the following tools: screwdriver, sandpaper (medium and fine grit), wood filler, putty knife, drop cloths, painter's tape, paintbrushes, paint or stain of your choice, and a clear protective coat.
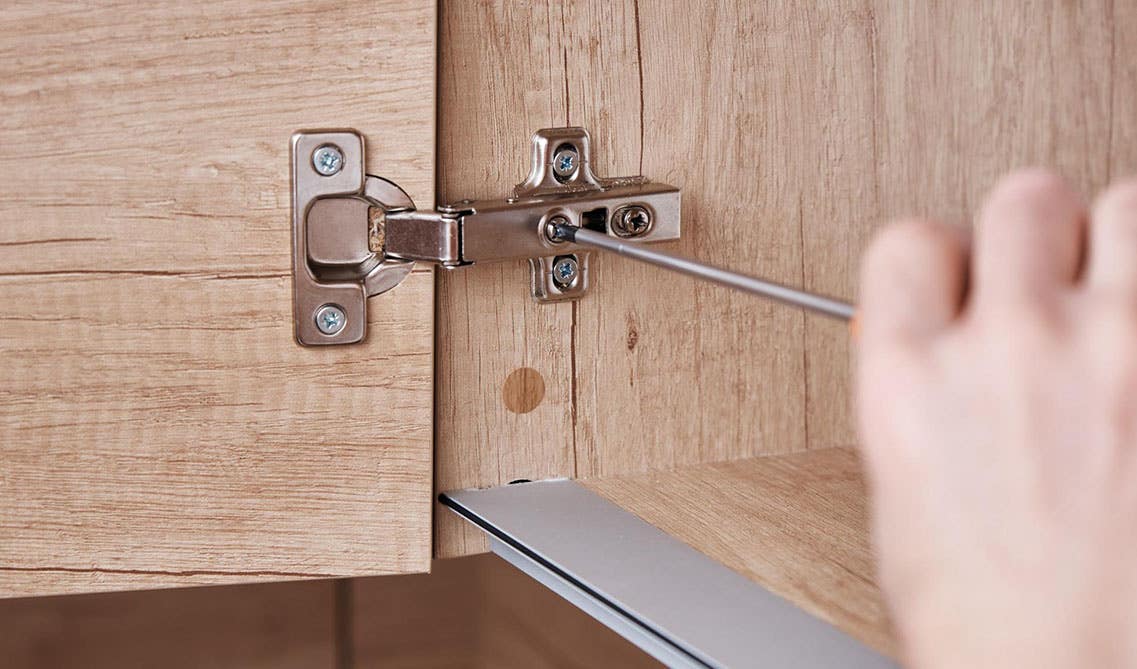
Step 2: Remove Cabinet Doors and Hardware
To ensure an even and thorough refinishing job, start by removing all cabinet doors and hardware. Use a screwdriver to take off the hinges, handles, and knobs. Keep these pieces organized and labeled so that reinstallation becomes hassle-free later on.
Step 3: Clean and Prep

Thoroughly clean all cabinet surfaces with a mild cleaner to remove any dirt, grease, or grime that has accumulated over time. This step is crucial, as it will ensure proper adhesion of the new finish. After cleaning, lightly sand the surfaces with medium-grit sandpaper to remove the existing finish and create a smooth base for the new coating. Wipe away any dust with a damp cloth.
Step 4: Repair and Fill
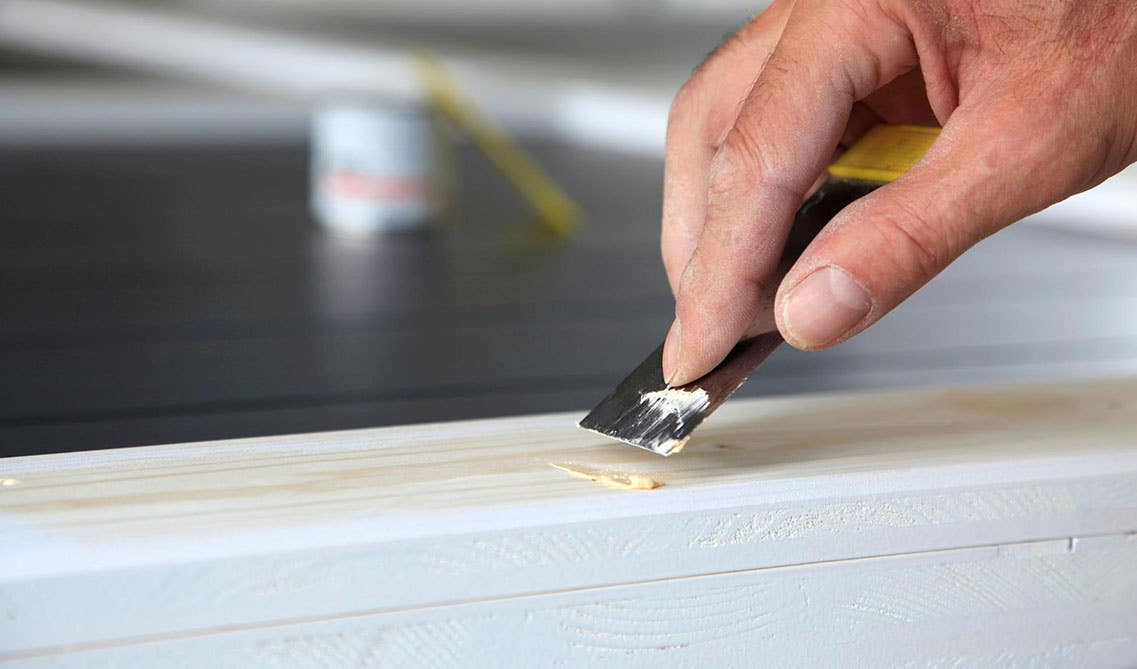
Inspect your cabinets for any dents, scratches, or holes. Use wood filler and a putty knife to repair these imperfections, ensuring that the surfaces are level and smooth. Allow the filler to dry completely and then sand it down until it blends seamlessly with the surrounding wood.
Step 5: Sanding
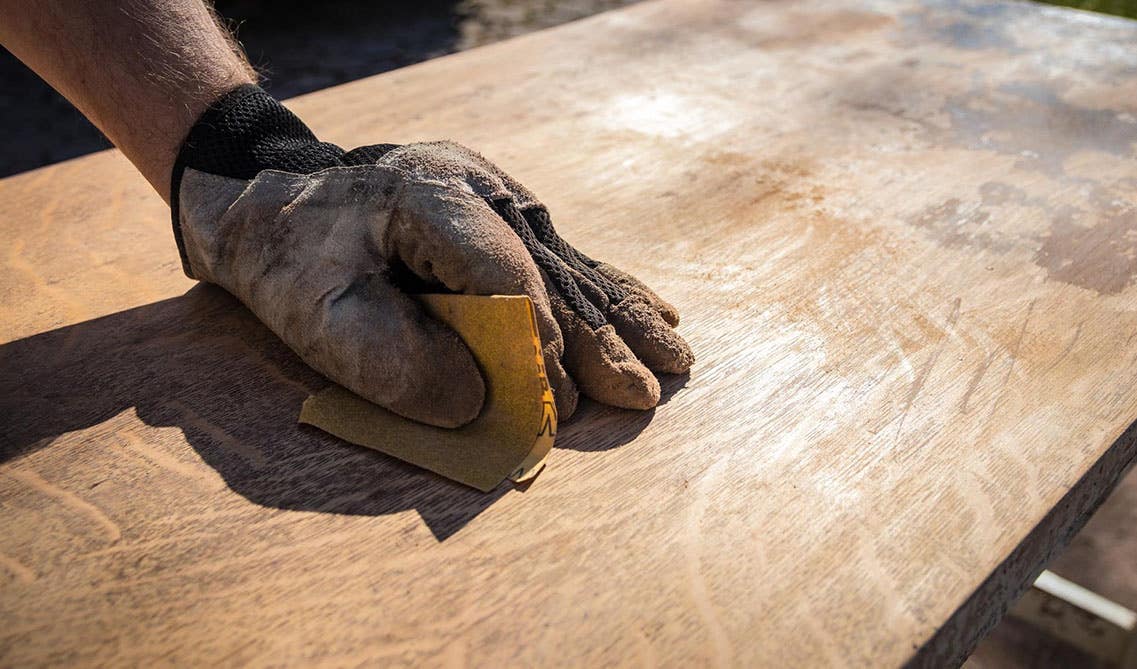
To achieve a professional finish, sanding is crucial. Start with medium-grit sandpaper to remove any remaining finish and roughen the surface slightly. Then, switch to fine-grit sandpaper for a smoother finish. Sand in the direction of the wood grain to prevent scratches. Remember to wipe away any dust with a damp cloth once you're done.
Step 6: Prime

Applying a primer is essential, especially if you plan to paint your cabinets a lighter color or if the wood has visible stains. Choose a high-quality primer suitable for your chosen finish. Use a paintbrush or a foam roller to apply an even coat of primer to all surfaces. Allow the primer to dry completely according to the manufacturer's instructions.
Step 7: Paint or Stain

Now comes the exciting part: applying the paint or stain to achieve the desired look. If you prefer a painted finish, select a high-quality paint designed for cabinets. Apply thin and even coats, allowing proper drying time between each layer. If you prefer a stained finish that showcases the natural wood grain, choose a suitable stain and follow the manufacturer's instructions for application. Apply multiple coats for a richer hue.
Step 8: Protect and Reassemble

To ensure durability and longevity, it's crucial to protect the newly finished cabinets. Apply a clear protective coat, such as polyurethane, to safeguard the surface against scratches and moisture. Allow sufficient drying time before reassembling the cabinets and reinstalling the hardware.
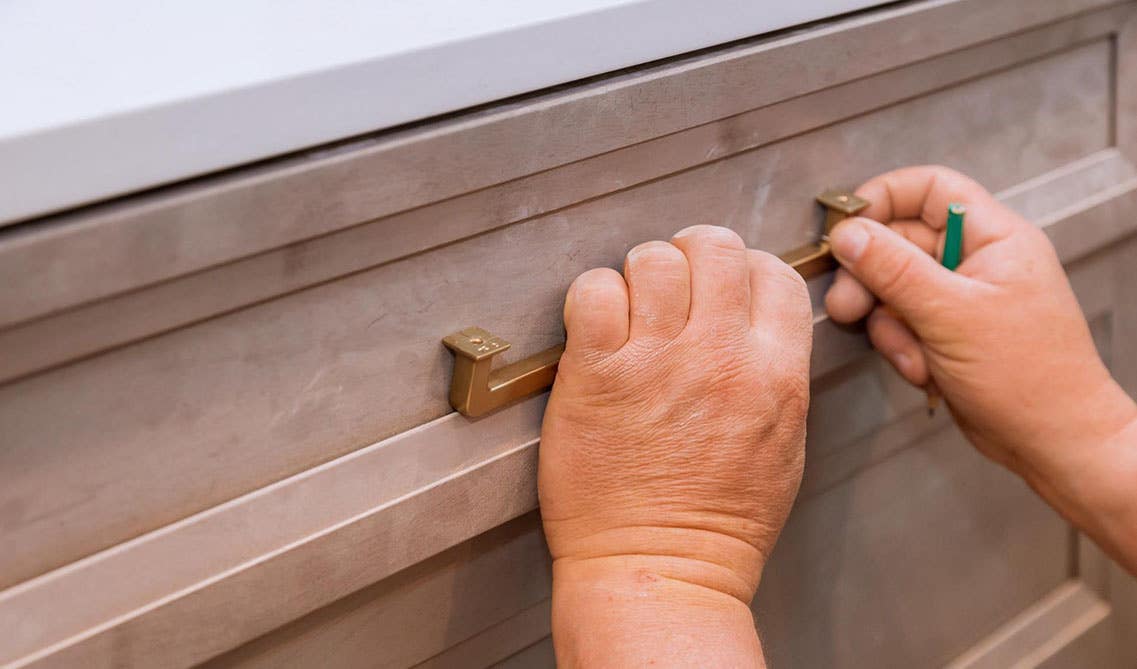
Step 9: Reinstall and Enjoy
Once everything is dry and cured, rehang the cabinet doors using the labeled hardware. Take the time to adjust the hinges if necessary, ensuring the doors hang evenly. Step back and admire your hard work. You have successfully refinished your kitchen cabinets and transformed the heart of your home into a stylish and inviting space.
After you are done refinishing your kitchen cabinets, consider switching out your old hardware with one of Lily Ann Cabinets’ stylish knobs and pulls to really bring your space to life.
In Conclusion…
Before diving into the exciting journey of refinishing your kitchen cabinets, there are essential factors to consider. First and foremost, assess the condition of your cabinets. Are they structurally sound and worth refinishing? Next, determine your desired outcome. Decide on the color, finish, and style that best align with your kitchen's theme. Consider the time and effort required for the project, as refinishing can be a time-consuming task.
Additionally, gather all the necessary tools and materials and set up a proper workspace. Finally, remember to budget accordingly, as refinishing can be a cost-effective alternative, but expenses can still add up. By carefully considering these aspects, you'll be well-prepared to embark on your cabinet refinishing adventure and achieve stunning results in your kitchen makeover.
Refinishing kitchen cabinets is a rewarding and budget-friendly way to breathe new life into your kitchen. By following these step-by-step instructions, you can achieve a stunning transformation without the need for a complete cabinet overhaul. With a little planning, preparation, and patience, you'll have beautifully refinished cabinets that will revitalize your kitchen and leave you proud of your DIY accomplishment. So, roll up your sleeves and get ready to enjoy the rewarding process of refinishing your kitchen cabinets.
Whether you're refinishing your existing cabinets or looking to purchase new ones, shopping at Lily Ann Cabinets is a smart choice for several reasons. For those refinishing, Lily Ann Cabinets offers a wide selection of high-quality cabinet doors and accessories, providing the perfect foundation for your project. Our cabinets come in various styles, finishes, and sizes, ensuring you'll find the ideal fit for your kitchen's design.
If you opt for new cabinets, Lily Ann Cabinets offers ready-to-assemble (RTA) cabinets, which are not only cost-effective but also easy to install. Get a free 3D design today from one of our experts to see how our RTA cabinetry will look in your home. Our customer service is top-notch, with experts ready to guide you through the selection process and answer any questions you may have. With a commitment to quality, affordability, and exceptional service, Lily Ann Cabinets becomes the go-to destination for anyone seeking to refinish or replace their kitchen cabinets.
FAQs:
1. Is refinishing cabinets a good idea?
Absolutely! It's a cost-effective way to transform your kitchen's appearance without the expense of replacing cabinets entirely. Refinishing also extends the lifespan of your cabinets, protecting them from wear and tear, and it's a rewarding DIY project that can yield impressive results.
2. What happens if I don't sand cabinets before painting?
Sanding is crucial as it creates a smooth surface for the new paint to adhere to, ensuring better durability and a professional finish. Without proper sanding, the paint may not stick properly, leading to chipping, peeling, or an uneven appearance. Sanding also helps to remove the existing finish, which allows the new paint to bond effectively and prevents any imperfections from showing through the fresh coat.
3. When refinishing kitchen cabinets do you stain or paint?
Staining is an excellent option if you want to showcase the natural beauty of the wood grain while giving the cabinets a rich, warm hue. On the other hand, painting offers more versatility in terms of color options and can create a modern, clean look. Both options can yield stunning results, so it comes down to personal preference and the overall aesthetic you want to achieve in your kitchen.
4. What is the average cost to refinish cabinets?
On average, the cost to refinish kitchen cabinets yourself can be anywhere from $500 to $2,000, while hiring professionals can range from $1,500 to $6,000 or more. It's essential to budget for materials, tools, and any additional services required.
Shop Related Cabinet Lines
Recent Blogs

Kitchen Decor
What Your Wife Really Wants for Mothers Day

Kitchen Cabinets,Wood Cabinets,Cabinet Tips,Cab...
Laminate vs. Wood Cabinets: Choosing the Best Material for Your Needs


25+ Ways To Style Grey Kitchen Cabinets August 1, 2019
18 Unique Modern Bathroom Ideas | Cabinets, Vanities + More October 22, 2019
11 Fresh Kitchen Backsplash Ideas for White Cabinets March 5, 2020
What Your Wife Really Wants for Mothers Day April 25, 2024
Why You Should Embrace a Solid Slab Backsplash April 4, 2024


Comments