subscribe to our Newsletter
How to Clean Kitchen Cabinets Step-by-Step
Over time kitchen cabinets build up grease and grime from dust, spills, food, cooking residue, and years of use. Spot-cleaning can take care of immediate, noticeable spots and dirt, but removing the years of layered grime and residue from your kitchen cabinets can be a real challenge. Keep your kitchen cabinets beautiful and fresh with these cleaning tips and tricks.
Supplies and equipment for cleaning kitchen cabinets:
- - Cleaning cloths for washing and drying
- - Specialty cabinet cleaner
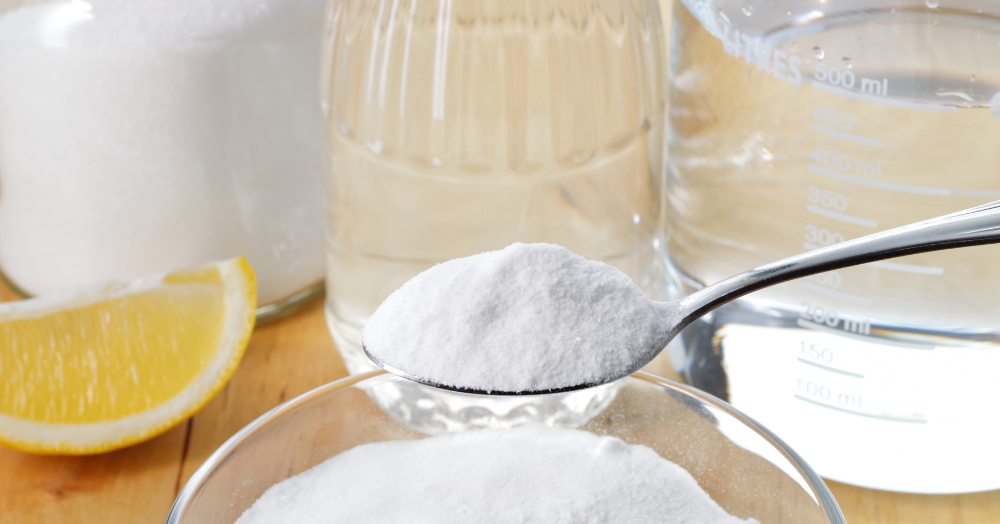
- - Eco-friendly or natural cleaner ingredients: vinegar, salt, and warm water
- - Dish soap
- - old toothbrush or small scrub brush
- - Bowl or bucket - Vacuum cleaner
Picking a Cabinet Cleaner
Before attacking the grease and grime on your kitchen cabinets, make sure you arm yourself with the most effective cleaning agents and ingredients. Commercial Cleaner - Murphy’s Oil Soap: There are many cabinet cleaning agents on the market, but you can never go wrong with Murphy’s Oil Soap. Used by homeowners for over 100 years, this product has proved its merit and effectiveness when cutting through grime and grease on kitchen cabinets. It leaves a clean finish on cabinet surfaces and a pleasantly mild citrus fragrance that does not linger. You can pick up a 16 ounce of Murphy’s Oil Soap for about $7 at almost any general merchandise or grocery store like Target, Walmart, Home Depot, and Family Dollar. Dish Soap The additives and ingredients in dish soap are specifically designed to gently but effectively remove oil, grease, gunk, and grime. If you don’t have a commercial cleaner on hand, dish soap is a fantastic alternative. Dawn® dish soap is especially powerful for fighting against grease deposits. Add a few drops of concentrated dish soap to a bowl of warm water. Soak a sponge in the soapy water and squeeze out excess water. Then wipe down your kitchen cabinets to remove the dirty residue that has built up over time. When you are done cleaning, wipe your cabinets down with a dry cloth or paper towel to remove excess water and prevent streaking.  DIY Natural Household Ingredient Mix In a tight fix? We have all been in a situation when those dirty kitchen cabinets need to be cleaned before the party begins, the in-laws stop by, or the holiday festivities get started. The problem is that you are all out of commercial cabinet cleaner and dish soap and you don’t have time to pick some up at the store. Or maybe you are looking to clean your kitchen with equally effective ingredients, but more eco-friendly and affordable. Whatever your situation, you can easily make your own natural cleaning solution with common household products. NOTE: Do not use your DIY vinegar or olive oil cleaning mix on wood cabinets. Non-drying oils will stay a liquid, attract bacteria, and start to smell. Vinegar is a powerful acid. Even when diluted with water, vinegar can potentially ruin the finish on your wood cabinets with contact. If your kitchen cabinets are made of a laminate, thermofoil, or metal material, you should have no problem using the following vinegar cleaning mixtures:
- Vinegar & Water for Everyday Grease and Grime (NOT on Wood): Vinegar is great at removing sticky films caused by dirty hands from daily use. Create a 50/50 solution of vinegar and warm water. Put your mix into a spray bottle and mist your dirty kitchen cabinets. Let the solution sit on the grease and grime for a minute or two and then wipe clean with a cloth.
- Vinegar & Salt Paste for Heavy Residue Buildup (NOT on Wood): If you are dealing with stubborn grease and grime on your kitchen cabinets, create a salt and vinegar paste. Mix a tablespoon of salt with enough vinegar to make a paste that you can apply with a damp cloth or old toothbrush. Lightly scrub the area, rinse it off with clean water, and dry with a clean towel.
- Baking Soda for the Hardest Stains and Spots (OK on Wood): When confronted with extremely difficult spots and stains like chocolate and syrup, mix two parts baking soda and one part warm water to create a powerful cleaning paste. Apply the past and lightly scrub the stain with a soft toothbrush, sponge, or nylon-bristle scrub brush. Wipe off the paste and dry the treated area. Unlike olive oil and vinegar, you can use baking soda on wood cabinetry. However, baking soda can still be pretty abrasive. Make sure you are gentle when cleaning wood cabinets with baking soda.
3D Kitchen Visualizer Tool
Bring your dream kitchen to life with our free kitchen visualizer!
Design NowHow to Clean Kitchen Cabinets Step-By-Step
Once you have all the supplies and equipment you will need, you can start cleaning those greasy kitchen cabinets. Here is a detailed guide on how to clean kitchen cabinets:
- Vacuum or Brush Off Loose Debris Removes dust, dirt, and other loose debris from your kitchen cabinets and drawers using a vacuum or brush. It will make the overall cleaning process less messy and allow the cleaner you have chosen to work specifically on the built-up residue of grease, grime, and gunk.
- Test the Cleaner You Chose on a Hidden Portion of the Kitchen Cabinet Before you start scrubbing down the surface of your kitchen cabinets, it is always a good idea to test on a hidden or less noticeable part of the cabinet like the inside of the door or drawer. While commercial cleaners like dish soap and baking soda are typically safe to use on wood, metal, and painted cabinets, you never want to risk the possibility of damaging the paint or finish on the cabinet surface. Read the instructions for the cleaner you choose and test it to prevent noticeable damage to cabinet surfaces. REMEMBER: Don’t use a vinegar or olive oil cleaning mix on wood cabinetry.
- Spot-Treat Difficult Stains and Drips Start by spot-treating stubborn pen marks, paint splotches, sticky syrup, dried chocolate, and rock-hard food splatters. Apply your cleaner to the stain and gently scrub it with a soft toothbrush, sponge, or clean cloth.
- Scrub the Hardware Don’t forget to clean cabinet hardware like door handles, drawer pulls, and knobs. Thoroughly clean cabinet hardware with the cleaner of your choice while using a toothbrush or cloth. Grease and grime can easily accumulate on hardware with intricate designs. Make sure to clean and the tiny fissures that could have gathered residue.
- Wipe Down the Inside of the Cabinet Door or Drawer You may find that the inside of your cabinet door or drawer is dirtier than the outside surface. Take the time to apply your cleaner and wipe down the inside of each door and drawer. The dishes, utensils, and kitchenware that you store in these cabinets and drawers will stay clean as a result.
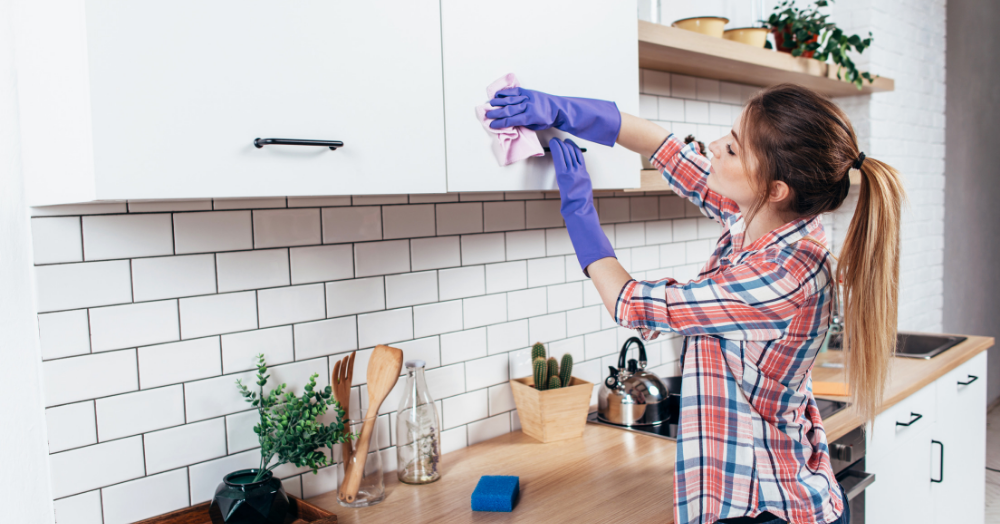
- Clean the Kitchen Cabinet Surface You are now ready to take on the surface of your kitchen cabinets. Apply your cleaner to the cabinet surface and wipe it down with a clean cloth or damp sponge. Your kitchen cabinets will be free of grease, grime, and other unwanted residues with a little elbow grease.
- Repeat the Process on Particularly Dirty Cabinets When specific cabinets do not come completely clean at first due to lots of built-up residues, repeat the process above a second or third time. Be careful not to scratch or damage kitchen cabinets due to overcleaning. Use a different cleaning agent if the original product or natural mix you chose is not effectively removing grease, grime, and gunk.
- Dry Everything with a Clean, Soft Towel Finally, thoroughly dry each internal and external cabinet surface with a clean, dry towel or cloth. You don’t want to leave excess water on the cabinet surface, and the drying process will prevent streaking.
You are done! Now that your kitchen cabinets are beautiful and clean, you can relax and enjoy yourself. For cabinet products and cleaning tips, call or contact Lily Ann Cabinets to learn more!
Recent Blogs
Kitchen Decor
What Your Wife Really Wants for Mothers Day
Kitchen Cabinets,Wood Cabinets,Cabinet Tips,Cab...













Comments