subscribe to our Newsletter
How To Install RTA Cabinets
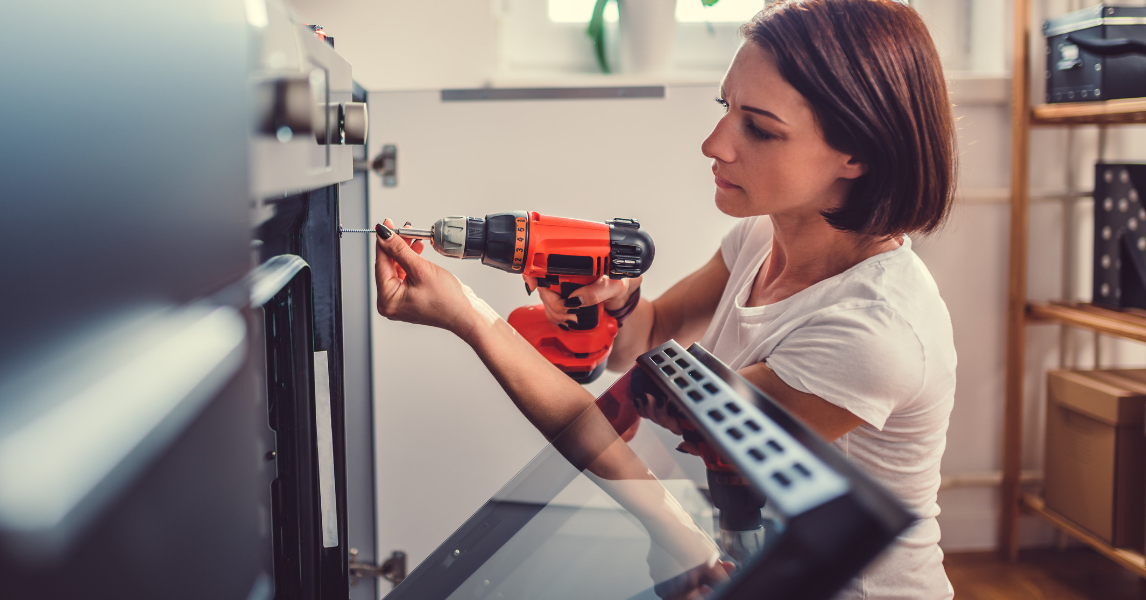
It’s no secret that we think RTA cabinets are the way to go for any kitchen remodel. However, for people who don’t have experience with remodeling, or constructing things in general, putting your own cabinets together and installing them can be daunting. Think of this article as your go-to guide for properly planning and executing your kitchen improvements. It’s easier than you think!
Preparing For RTA Cabinet Installation
The first and most critical step in the installation process is the measuring you do beforehand. These measurements will be your map, and there are several things to factor in to ensure they lead to success. For example:
Keep the measurements of your base cabinets in mind when measuring for your hanging wall cabinets. You’ll want to leave 18-20 inches of free space depending on how large your countertop appliances are.
Include the thickness of your countertops into the free space measurements.
Be aware of where electrical wires and plumbing are located. You don’t want to interfere with the things that power your kitchen!
Consider the direction the cabinet doors are going to open. Make sure they’re not going to collide with walls or each other.
Use a stud finder to locate and mark wall studs; they are crucial for supporting your hanging cabinets, and also where your ledger boards (support boards) are going to be placed.
Unless you’re completely reconfiguring your kitchen, the placements of your old cabinets make the perfect baseline for your new cabinets’ measurements. You might not even have to look for studs because, in all likelihood, they’ve already been marked from the previous installation! Along with your studs, you’ll want to mark the horizontal line representing the top of your wall cabinets, followed by vertical lines for where they will be mounted.
Another tip for installing base cabinets: if you have uneven flooring in your kitchen, start installing your base cabinets from the highest ground point to the lowest ground point. This makes height matching easier and ensures that your countertops will be level.
Preparing For RTA Cabinet Assembly
As with all of our RTA kitchen cabinets, instructions will be provided with your product and are also available online. Many of our cabinets follow the dovetail assembly process, which is straightforward and relatively quick. Plus, once you’ve assembled one, the others will go much faster because you fully understand the process!
To assemble our RTA cabinets, you only need wood glue, a cordless drill, and a rubber mallet. All of the screws, clips, and other hardware you need are supplied with the cabinet. It’s a good idea to get all of your parts organized before starting so everything is easy to find.
Assembling The Hanging Wall Cabinets
Here are the steps for putting together wall cabinets using the dovetail assembly process:
Put down a protective layer over your workstation to avoid scratches and place the cabinet with its front face down.
Apply wood glue to the base frame’s side grooves.
Slide cabinet sides into place along the grooves.
Apply wood glue to the base frame’s top and bottom grooves.
Slide the bottom and top panels of the cabinet down into place.
Glue the side edges of the cabinet’s back panel.
Slide the back panel into place.
Secure the back panel by drilling a long screw into each of the pre-drilled holes.
Attach one metal bracket to each of the corners on top of the cabinet. They require three short screws each.
Attach metal shelf clips into the holes within the cabinet at the desired height. You can remove these clips at any time to raise or lower the shelves to your preference.
Slide the shelves into place. You’ll hear a click when the clips are securely fastened.
Stick the neoprene door stoppers to the top and bottom corners of the shelf door.
All of these steps can be found in your instruction manual. If you need more visual references, including how to install the metal clips and corner cabinets, you can also find additional cabinet assembly videos here.
Assembling The Base Cabinets
Base cabinet assembly is slightly more complex, but still easy to do. As with the hanging wall cabinets, the only supplies you need are wood glue, a rubber mallet, and wood glue. However, you might want to have another person to help you; there are a few points in the assembly process when you have to flip the mostly-constructed cabinet over. Remember to organize your parts before starting! Here are our steps for putting together base cabinets using the dovetail assembly process:
Like you did with the hanging cabinets, you’ll want to start by putting down a protective layer over your workstation and placing the cabinet front face down.
Apply wood glue to the side grooves of the base panel.
Slide the cabinet sides into place.
Apply wood glue to the groove on the bottom of the front and side panels.
Slide cabinet bottom into place. Allow it to set before moving onto the next step.
Apply wood glue to the remaining grooves on the bottom and side panels and slide the cabinet back into place. It’s important to have the bottom panel firmly set in the face groove so the back grooves will all line up.
Your cabinet now has all of its sides and an open top. Attach one corner brace to each top corner with four screws each.
Flip your cabinet upside down to attach the toe kick. To attach, apply wood glue to the side grooves of the toe kick and slide it into place.
Fasten the toe kick into place with two clips and four screws each.
Grab the back support. Apply glue to the side grooves and fasten the support with two clips and four screws each.
Flip the cabinet back over to attach the cabinet glide clips. They will screw into the inside back of the cabinet using the pre-drilled holes with two screws each.
Slide glides into place and attach to the metal clips on the back of the cabinet.
The front end of each glide will rest on the face frame. Use one screw to fasten each of the glides to the frame.
To construct the dovetail drawers, add glue to each of the dovetails and attach the front, back, and one of the sides together. They fit together like puzzle pieces and, with the help of your rubber mallet, they’ll be easily secured.
Slide the bottom of the drawer into the groove on the front, back, and side pieces.
Apply glue to final side and attach to the front, back, and side of the drawer. Use your mallet again to lock it into place and wipe off any excess glue with damp paper towel.
Repeat steps 14-16 for the second drawer.
Turn your drawers upside down. Attach one drawer clip to the two bottom front corners of each drawer with 2 screws each.
Slide the drawers onto the glides. They’ll click when fastened into place.
Attach metal shelf clips to the holes within the cabinet. Like the hanging cabinets’ shelf clips, they can be moved to a different position at any time. They will also click when fastened.
Stick the neoprene bumpers to the corners of your drawers and cabinet doors, and you’re done!
Installing Your RTA Cabinets
Installing RTA cabinets is the easiest part! Now that you have all of your measurements marked and your cabinets constructed, you simply need to put them into place. You will start with the hanging wall cabinets. Be sure to enlist another person’s help for this process — it’s very hard and dangerous to attempt holding a cabinet in place while also drilling them in. While your partner holds the cabinet, you will use the stud markings and support board to guide and fasten it into place.
Now you can move on to base cabinets! As mentioned above, you will want to start installing them from the highest ground point in your kitchen, if applicable. Other than regularly checking that their height matches, you simply need to screw them into place.
And you’re finished! Bask in the excitement and pride of having completed another step in your remodel cheaply, efficiently, and beautifully!
Ready For A Beautiful Kitchen?
Request a free sample to see our cabinets in person. You can also use our free 3D kitchen design tool to start making your dream kitchen a reality. Feel free to contact our dedicated team members with any questions about our RTA kitchen cabinets.
3D Kitchen Visualizer Tool
Bring your dream kitchen to life with our free kitchen visualizer!
Design NowRecent Blogs
Bathroom Cabinets,Bathroom Design,Bathroom Remodel
Single Sink Bathroom Vanity: Space-Saving Solutions for Your Bathroom
Cabinet Hardware
Smart Cabinet Hardware Ideas for Modern Living
Kitchen Cabinets,Buying Guide









Comments