
subscribe to our Newsletter
How to Install Outdoor Lighting


Adding outdoor lighting to your home can make a world of difference. Whether in the backyard, patio or front porch - you won’t realize what you’ve been missing until now!
Lily Ann Cabinets offers a variety of cabinet and outdoor lighting, perfect for your home! From sconces by the front porch or next to the garage to LED floodlights that will illuminate any backyard - we’ve got you covered.
Why install outdoor lighting?
Increased safety and security
Installing outdoor lighting for your home is an excellent way to increase safety and security when it’s dark outside. If you have a camera outside, these lights will help increase the visibility of any footage captured!
Increased curb appeal
Outdoor lighting creates a much more welcoming atmosphere for those guests who arrive after sunset. The soft lit path to the door, combined with dramatic effects like landscaping or architecture, makes for a unique outdoor space that you can enjoy all year long! It also helps define your patio, so it’s never hard to point out what direction they’re going in when walking past.
What types of outdoor lighting can be installed?
- Pathway Lights
- Driveway Lights
- Patio/Deck Lights
- Exterior Garage Lights
- LED Step Lights
Note: There are several other locations to install outdoor lighting. These are the most common areas.
Pathway Lights Installation
Pathway lights are a great way to illuminate your guests and yourself on footpaths, pathways leading up front steps, or down towards pools. These are usually referred to as mushroom lighting.
If you’ve already chosen which fixtures to add to your pathway lighting plan, it’s time to install. Installation may seem daunting at first glance, but this guide on how some of the most popular path lights can be installed will make it simple!
You will need basic materials for any lighting installation job, including a low-voltage transformer and cables. You may also want to use tools like mallets or drills, depending on what type of light you’re installing! There’s nothing more satisfying than getting all these tasks done quickly by following our simple steps below.

Mushroom Pathway Lighting
You may need some supplies if you plan to bury wires or place lights on a hard surface, including a drill with a 3/4-inch auger bit and a shovel. You may also need HD wire, Plug-N-Play connectors, splitters, and a transformer; all included if you purchase a light kit.
Here are the steps to install these low-voltage landscape lighting options:
- Find the desired placement of lights and wiring. Plan accordingly if you choose to bury the wire under concrete or other permanent structures.
- Place all lights in your preferred location. Use a 3/4″ auger in a drill to ensure the fixture is in place.
- Run all wires from the power source to the lights on top of the soil, leaving them a little loose.
- Connect all lights. Make sure all components are working.
- Connect the opposite end of the male wire to a port on the splitter that is connected to the transformer. You can mix all lights on the same circuit but ensure you do not put more than the limit of lights per transformer.
- Preview where the lights are placed in the dark to ensure the desired effect is achieved. Test the lights to provide the power supply, connections, and light fixtures to work correctly and have an appropriate placement.
- Once the components are placed, work from the light fixtures toward the power source to bury the wire to the desired depth. Ensure that lights work with all wiring attached before burying any wire. No more than 1 - 3” is required.
Driveway Lighting Installation
Several types of driveway lights can be installed quickly, but we like the durability of the lights that can withstand being run over.
Solar LED Road Pucks
- Let them charge for a day and lay them out at night to ensure they are all working and you like the direction the light is shining and the spacing.
- Buy two tubes of Liquid Nails Heavy Duty Construction Adhesive (for use with a caulk gun).
- Preclean the spots where you want them on the driveway.
- Liberally apply the adhesive, set them in place, and let them dry. (We recommend wearing rubber gloves because it’s easiest to smear the liquid nails around with your finger unless you like picking glue out of your nail beds).
This is a super easy and fast project, and your new driveway lights help people stay on the driveway when they’re backing out in the early morning or late at night.
Patio or Deck Lights Installation
Installing patio or deck lights can make any home feel inviting and relaxing. By installing weatherproof outdoor lighting fixtures like those found in this guide (which are great because they’re easy to change between different areas), using that space year-round will become more accessible than ever before! Hanging string lights make for an attractive addition to your backyard, patio, or deck; they can also provide more flexibility when using them.

String Lights - Using trees to Hang Outdoor String Lights
Trees are organic braces for outdoor string lights, especially if you have them on both sides of the area. If you learn how to string lights across the backyard correctly; your lights will look like they’re floating in the air after dark.
- First, calculate the distance from tree to tree where you want to hang the lights. Give thought to how tight you want the lights pulled.
- Drill holes on the trees where you want to hang the lights. Then, string the lights from one tree to the next, holding them carefully to ensure the holes are the proper distance . Label the spots on the trees and drill the holes.
- Put a hook into each tree at the labeled spot. Then put the bulbs in your string lights.
- Put the string lights onto the hooks you have placed. Make sure they’re secure.
- Power your lights using an extension cord if needed.
- Check to be sure your string lights work correctly.
Using Your Deck Railing to Hang String Lights
You can also put the string lights on your deck railings.
- Measure your string lights to run the span of the deck railing. If you prefer, light only the main span of the railing and leave the sides open.
- Ensure your string lights are attached to an extension cord or close to an outlet before you begin installing them.
- Using the staple gun to secure the lights under your railing, starting with the string light closest to your power supply. This will keep staples out of sight while holding your string lights in place. Do not let the staples put holes in the strings.
- Finish this process by putting staples near each light. Pull the string of lights tight as you go.
- Install the bulbs and check your lights.
Note: Use exterior tape instead of staples if you are concerned about damaging your railing.
Using Stucco, Wood, and Other Materials to Hang Outdoor String Lights
Another way is to just attach them to places in your house like stucco and wood. The difference is that you may need to use wall anchors, especially for that material, to secure the hooks.
- Using hooks and staples may be the most stable option. This is especially true when your string lights hang overhead, such as on a covered patio or deck.
Exterior Garage Lights Installation
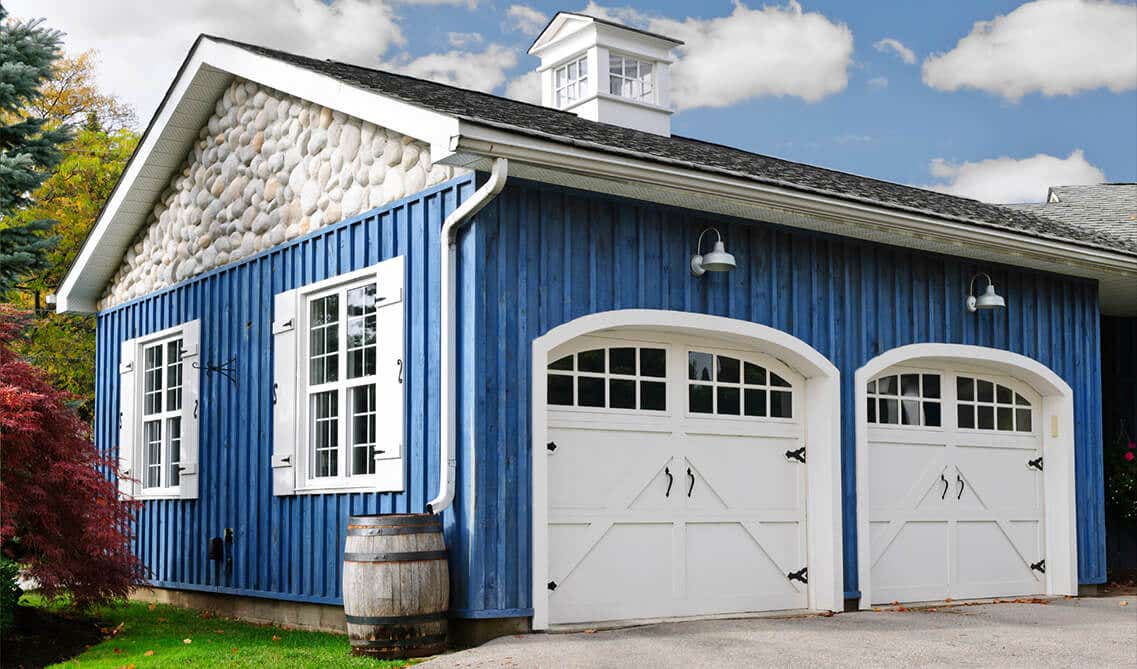
Adding exterior garage lighting not only looks great but adds another layer of security to your home, especially if you install a flood light with a motion sensor.
While the installation process can vary depending on the type of lights and manufacturer, we’ll cover the general steps to adding outdoor lights to your garage.
1. Decide Where to Install the Light Fixture
You’ll want to know exactly where to install the fixture before starting. Consider the mounting height and location, as this can affect functionality and compliance with local building and electrical codes. Also, measure the path for the wires, which should be in a conduit that protects them and provides a safe route around the garage perimeter.
2. Turn Off Power to the Garage
Switch off the circuit breaker to the garage, at the main electrical panel, to avoid getting shocked or starting a fire. Test an outlet with a non-contact voltage tester; this ensures the power is off. To do so, insert the nose of the tool into the outlet’s narrow hot slot. It won’t respond if the power is off, but if it’s on, there will be a flashing light and audible chirp.
3. Prepare for Installation
If you have an existing light, remove it with its mounting bracket. The new fixture should include its mounting bracket. When replacing the bracket, use a level to ensure the crossbar is level.
To provide an appropriate connection point, proceed in one of the two following ways:
If there’s an existing wall receptacle: Use a screwdriver to remove the receptacle and screw the metal mounting from the extension box into the wall’s electrical box. Using the screwdriver, pry the round plug from the top of the extension box and attach the 1/2-inch conduit connector to the top. Then screw the extension box into the light fixture’s mounting plate.
If there isn’t a wall receptacle: Cut a hole the size of the retrofit box in the outside wall. The package should mount snugly into this space with little room around it. Then pull the electrical wire from the box to the wall and the power source. Access holes may need to be drilled into drywall. Or, you can use a surface conduit to run the cable.
4. Connect the Conduit
On one end of the conduit, slide a right-angle connector; on the other end, insert the connector into the extension box. After measuring from the top of the extension box to the ceiling, subtract 1½ inches and place the matching conduit piece. Sharp burrs should be smoothed with a file.
Add a conduit hanger to the conduit, mark the position, and screw the hanger to the wall; tighten the hanger screw. The conduit should be supported every 12 inches, and use conduit elbows whenever crossing a corner.
5. Complete the Wiring for Your Outdoor Light
Next, connect a junction box to the conduit along the front wall. A 14/2 nonmetallic cable should run through the hole in the wall through the box. Attach a cable connector to the round outlet box, feed the nonmetallic cable through the connector, and screw it in place. Fill the hole in the wall with caulking. The outlet box is then screwed in to secure it against the siding.
6. Remove the cover plate for the extension box and push the electrician’s tape into the closest right-angle conduit connector, extending it through the box.
Tape copper wires to the fish tape and pull them through. Once the wires are hanging out of the connector, push the tape into the conduit at the junction box.
7. As you wire the outdoor light, wrap the ground wire (typically green) once or twice around the ground bolt threading near the head. Tighten the ground bolt. Black wires connect to black terminals, white wires to white terminals, and green or bare ground wires to their respective terminals. Follow the manufacturer’s instructions for wiring the new fixture.
8. Strip plastic insulation from the ends if necessary and twist the wire ends together. Seal the ends with plastic wire connectors or electrical tape for waterproofing.
9. Install the Fixture
To assemble the fixture, screw the motion sensor into the center hole of the lamp-holder cover and thread the lamp holders into the side holes of the sensor. Tighten the motion sensor and lamp holders with a finger, then connect the cable to the garage light. Mount the fixture to the outside wall, install the light bulbs, and place the lamp-holder cover onto the light.
Now you can turn the power back on and test your outdoor garage lights. Adjust the lamp holders and motion sensor as needed.
LED Step Lights Installation
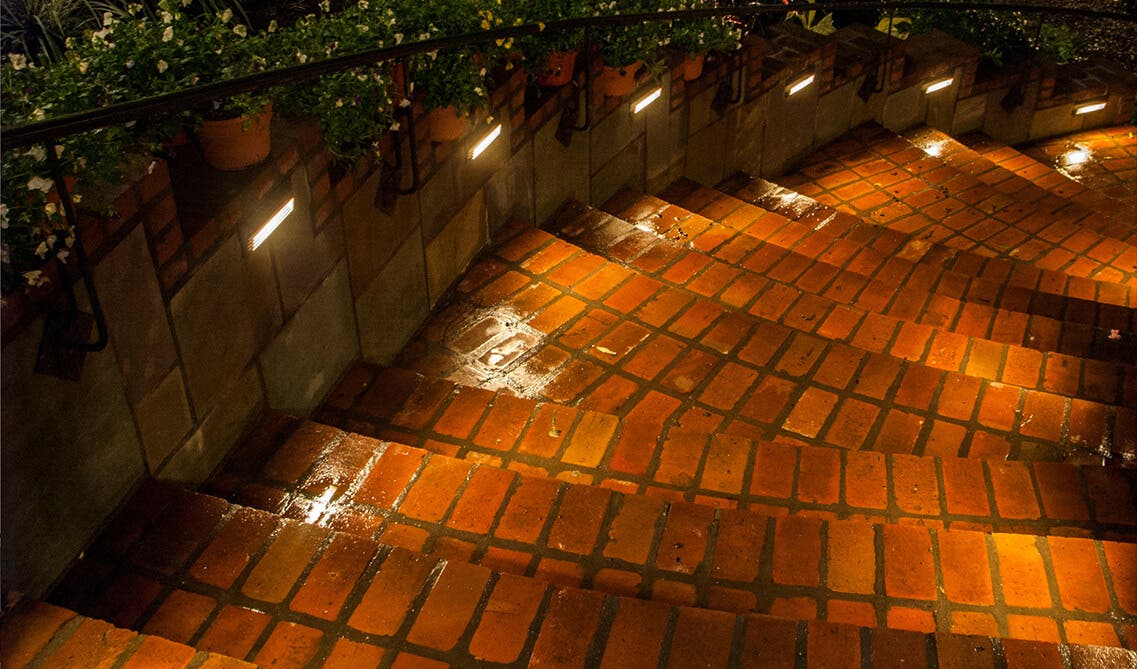
Installing low-voltage LED step lights is a cost-effective way to illuminate the steps outside your home. The soft glow these fixtures provide makes it easy to see what’s at hand while also creating an atmosphere that can be relaxing when coming up those last few stairs before reaching your deck or garden space!
Not only do they offer just enough illumination, but since their installation doesn’t require much work on behalf of its users’ safety, it should not deter anyone from using them. Especially considering how many people have been saved by having better visibility during rainstorms thanks to this type of lighting technology in recent years.
1. Determine the spots for your step lights
Mark the locations of your step lights. Make sure that the stringers do not obstruct the step lights. Cut an opening on the riser board where you place the recessed step lights. Step lights come in various sizes and shapes, so make sure you follow the manufacturer’s instructions for the proper size opening. After that, put the transformer next to the electrical outlet.
2. Run the wire
Starting with the one furthest away from the transformer, run the wire from light to light. Leave a large loop of wire at each step light location.
3. Strip the wire
Cut the wires for each light, then pull them into 2 to 3-inch strands. Using a wire stripper, remove about half an inch of sheathing from each wire and the wires from the light fixture.
4. Match the colors of the wires
There should be one black wire, and another wire may he white. Hold the ends together, then twist waterproof wire nuts to create a tight connection. With electrical tape, wrap the connection.
5. Secure the transformer
For this step, read the instructions that came with your transformer. Turn the switch to off. Secure the transformer into the location with the use of mounting brackets. Run the wires into place, then connect. Ensure that the photo eye sensor is exposed to sunlight.
6. Test the light
Plug the transformer into the outlet. turn it on to test the lighting, and set the timer as necessary. Unplug the transformer. Carefully attach the top cap to hide the low voltage wire, ensuring that you do not screw into the wire.
The Takeaway
If you’re looking to add outdoor lighting to your home, Lily Ann Cabinets offers a variety of options that will fit your needs. Visit our website today for more information on how we can help light up your life!
FAQ
1. How do you connect outdoor lights to power?
Once you Identify where you want your light fixtures to be located, as well as where you’ll set up your transformer box. Use a material like string or spray paint to map a route to and from your light fixture to the outlet/transformer it will be plugged to.
2. What is the best outdoor lighting?
The best outdoor lighting is determined by the needs of your home! Whether you are looking for security, pathway, or accent lighting, there are plenty of options available to you. Here at Lily Ann Cabinets, we offer a variety of lighting options to help you find the best lighting for you and your home.
3.Do you need an electrician to fit an outdoor light?
You do not need an electrician to install outdoor lighting; however, if you feel that expert help would be more beneficial to prevent any electrical mishaps, an electrician would be able to help you easily install all of your outdoor lighting.
4. What are the lights called on the outside of the house?
There are many different types of outdoor lighting options available like sconces, flood lighting, lamps, and more. These lighting options are grouped into the category of outdoor lighting or exterior lighting.
Shop Related Cabinet Lines
Recent Blogs

Bathroom Cabinets,Bathroom Design,Bathroom Remodel
Single Sink Bathroom Vanity: Space-Saving Solutions for Your Bathroom

Cabinet Hardware
Smart Cabinet Hardware Ideas for Modern Living

Kitchen Cabinets,Buying Guide
Beware of the Unseen Expenses in Kitchen Cabinet Renovations: Key Considerations


25+ Ways To Style Grey Kitchen Cabinets August 1, 2019
18 Unique Modern Bathroom Ideas | Cabinets, Vanities + More October 22, 2019
11 Fresh Kitchen Backsplash Ideas for White Cabinets March 5, 2020


Comments