
subscribe to our Newsletter
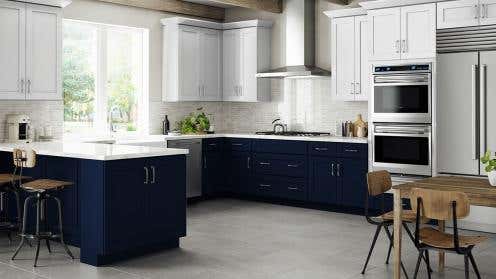
How to Install a Range Hood


Installing a range hood is a great way to improve the ventilation in your kitchen and keep your cooking area clean. Not only that, but it is aesthetically pleasing. There are a few different ways to install a range hood, so choosing the best option for your home is essential.
In this blog post, we will provide step-by-step instructions for installation. So whether you are a homeowner, renter, or contractor, this blog post has everything you need to know about installing a range hood.
- Choose the right range hood for your kitchen
- Remove the old hood, If necessary
- Locate and mark the vent holes
- Cut interior hole and drill locator holes
- Cut the siding
- Attach the duct
- Run power to the range hood
- Connect the wires
- Venting through masonry wall
1. Choose the right range hood for your kitchen
When choosing a range hood for your kitchen, remember a few things. First, you'll need to decide what style of range hood you want.
Once you've decided on a style, you'll need to select the correct size range hood. There are three basic range hoods: island range hoods, wall-mounted range hoods, and under-cabinet range hoods. Each has its benefits and drawbacks, so choosing the one that will work best for your particular kitchen is essential.
The size of the range hood should be based on the size of your stove or cooktop. A too-small range hood will be ineffective, while a too-large range hood can be overwhelming.
Finally, you'll need to choose a range hood with the right features for your needs. For example, if you do a lot of cooking with b odors, you'll want a range hood with powerful ventilation.

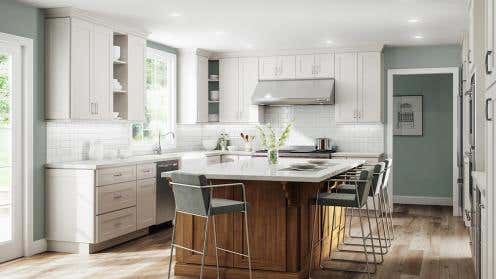
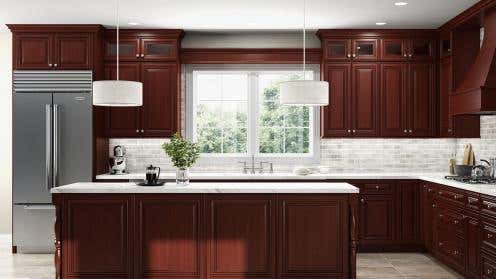
Lily Ann Cabinets offers various range hoods in all different styles and sizes and multiple features. With so many options available, you're sure to find the perfect range hood for your kitchen.


2. Remove the Old Hood, If Necessary
When ready to replace your range hood, you must remove the old one first.
- First, start by turning off the power at the breaker box and unplugging everything inside the oven or kitchen area, so no one gets injured if cables are attached to lights.
- Next, have someone hold down one side while another pulls up on the opposite end until all screws holding the cover come out easily enough.
- Once these are loose, remove them and set them aside along with other parts like fans.
3. Locate and Mark the Vent Holes
Range hood installation in the kitchen involves:
- Drilling a hole in the wall.
- Attaching new ductwork.
- Add new wiring as it most likely isn't there.
- Start with unboxing the range hood and removing the filter, exhaust fan, and electrical housing cover. The new range hood should be big enough to go one inch past the oven on all sides.
- Use a hammer and screwdriver to take out the electrical cable and duct knockouts. Place a cable connector into the cable knockout.
- Hold the range hood in place against the wall. Mark the locations for the duct and the cable. You will need someone to help with this step. Some range hood models provide a template for marking the holes.
Note: Typical models should be installed about 18 to 24 inches above the cooktop surface, while high-capacity hoods should be installed 24 to 30 inches above the cooktop.
4. Cut Interior Hole and Drill Locator Holes
Make sure to choose the direction of your vent that will lead from indoors to outdoors most directly. (A rule-of-thumb suggests taking the shortest path.) If your stove is not on an exterior wall, consider consulting with a home improvement specialist as needed for extension through the roof or other means necessary.
- Use a saw to make a vent hole through the interior drywall or plaster. You can also use a reciprocating blade or any power tool if you're more comfortable with that method since it will cut faster than drilling! Wear a mask and eye protection when operating these tools to avoid accidents.
- Use a long bit to drill holes at each corner of the vent hole through the outer wall.
Note: Make sure to avoid studs, pipes, or wires while cutting through the walls. If you need to move pipes or wires, you should consult with a plumber or electrician.
5. Cut the Siding
- Find the locator holes outside of the house.
- Use a pencil to connect the dots between the holes to outline the vent hole.
- Cut the vent hole in the outside of your home using a reciprocating saw or a saber saw with an extra-long blade to follow the outline.
- Clear away any insulation or debris that could interfere with installing the duct.
6. Attach the Duct
- From the outside of your home, push the duct's wall cap into the hole to see if it is long enough to get to the range hood. If not, buy a duct extension and connect it with sheet metal screws and duct tape.
- Apply caulk to the outer home where the cap flange will rest.
- Push the cap into place and secure it with screws.
- Caulk the perimeter of the flange.

7. Run Power to the Range Hood
- Shut off the power to the circuit and make sure the hood's power switches are in the "off” position.
- Run the cable from a receptacle box or junction through the hole in the wall.
- Strip the casing and attach the cable to the range hood with a cable connector.
- Mount the hood securely with mounting brackets. You will need someone to hold the range hood in place while you place the screws.
Note: You should consult an electrician if you need to extend the wiring to the vent hood location.
8. Connect the Wires
- Before wiring to the range hood, confirm that the power is off.
- Splice the white wire to the white fixture lead, the black wire to the black lead, and the ground wire to the green lead.
- Arrange the wires into place and replace the electrical cover.
- Reattach the range hood fan and filter.
- Restore power and test the range vent.
9. Venting Through Masonry Wall
When placing the vent through a masonry wall, you will use a fairly different way to cut through the wall.
- You will use a long masonry bit to drill the holes.
- Mark the outline, and make sure that the vent can fit with some room to spare.
- Drill holes roughly every inch along the outline.
- Use a hammer and chisel to carefully chip between the holes.
- When the hole is completed, follow the instructions outlined above for hooking up the vent.
- Next, drill holes and drive masonry screws to attach the duct cap.
Note: After sawing, cutting, or drilling, vacuum up the dust. Make sure to wear eye protection and a respirator mask while drilling or cutting through masonry.
Last Note: Be aware of the voltage difference when shopping for appliances. The difference between 3- and 4-prong outlets can be crucial for your home's wiring. For older homes built before 2000, you'll need an outlet with three blades on the cord; newer ones feature four points of contact for safety reasons (to avoid exceeding voltage).
The Takeaway
Range hood vent installation for the first time requires drilling and cutting holes in your kitchen wall, whereas, replacing a range hood may allow you to use any existing vents. Installing an exhaust fan over your oven or stovetop can improve ventilation which helps clear out all that unwanted cooking smoke!
We have given you the step-by-step guide on how to install a range hood. For more information on range hoods, check out https://www.lilyanncabinets.com/cabinet-articles/is-a-range-hood-right-for-your-kitchen/
We would love to help you with your kitchen needs. Contact Lily Ann Cabinets today for your free design quote.
FAQ
How to clean range hood filter?
- Remove the filters from the hood: The filter should easily slide or pop out of the underside of the hood.
- Fill a sink or bucket with boiling water: Hot water is effective in breaking down the grease build up.
- Pour in baking soda and dish soap: Pour degreasing dish soap and 1/4 cup baking soda into the hot water.
- Put filters in water: Submerge your greasy exhaust fan filters into water. Make sure they’re completely covered.
- Let them soak: Allow the filters to soak for 10 minutes.
- Scrub the filters: After soaking, take a non-abrasive scrub brush and scrub the filters.
- Rinse and dry: Rinse the filters thoroughly in hot water and dry with a paper towel or clean cloth.
- Replace the filters and repeat as needed: Put the filters back into the hood, and repeat as needed. Cleaning the filters once a month is a good maintenance strategy.
How to remove range hood filter?
The filter should easily slide or pop out of the underside of the hood.
What size range hood for 30 inch cooktop?
For a 30 inch cooktop, install a range hood that is at least 36” wide indoors and 42” wide outdoors.
Do range hoods have to be vented outside?
No! Range hoods without a duct, or ductless range hoods, can recirculate air back into your kitchen.
How does a range hood work?
- Additional lighting. As we all try to perfect our cooking skills, poor lighting does not work in our favor to create exceptional meals! The kitchen hood adds an extra bright light, right above the stove, granting a feeling of safety whilst preparing ingredients. In addition, this light can also be used as an ambient night light for those late night trips to the fridge!
- Removes Excess Heat. The range hood removes excess heat while also improving the overall cleanliness of the kitchen. Within the kitchen hood, there is a fan built-in which draws out the steam and heat, created while cooking. The excess heat is then drawn out through the vent, overall boding well for keeping the kitchen at a cooler temperature.
- Increased Cleanliness. The kitchen hood keeps the air clean, keeping your home safe. The built-in fan draws out airborne toxins created while cooking, keeping the air well-circulated and avoiding inhalation of gasses with potential harm.
Shop Related Cabinet Lines
Recent Blogs

Bathroom Cabinets,Bathroom Design,Bathroom Remodel
Single Sink Bathroom Vanity: Space-Saving Solutions for Your Bathroom

Cabinet Hardware
Smart Cabinet Hardware Ideas for Modern Living

Kitchen Cabinets,Buying Guide
Beware of the Unseen Expenses in Kitchen Cabinet Renovations: Key Considerations


25+ Ways To Style Grey Kitchen Cabinets August 1, 2019
18 Unique Modern Bathroom Ideas | Cabinets, Vanities + More October 22, 2019
11 Fresh Kitchen Backsplash Ideas for White Cabinets March 5, 2020


Comments