DIY Staining - How and When to Do It
Though we at Lily Ann are proud to offer our affordable and durable cabinets in a variety of colors, we recognize that our palette might not include the exact hue you wanted for your new kitchen. Luckily, staining our cabinets is just as easy as assembling them; with a little elbow grease and the right tools, you can turn the sturdy wood just about any color you like. Here are a few tips that first-time stainers should keep in mind.
Risks
First of all, it’s important to mention that staining your cabinets means taking on certain risks. Though there’s little chance of not eventually getting the wood to the color you want - you can always start over if you screw up, annoying as that might be - there are a few precautions worth taking to protect your health and your property.
As with any other DIY project, it makes sense to tackle the task in clothing you don’t really care about. Oil-based stains in particular can be very stubborn if they get on your skin or fabric; it may be necessary to rinse the spot with water for more than fifteen minutes after it’s been scrubbed with dish soap. Water-based stains are comparatively tame and usually disappear if immediately addressed with soap and water.
Adequate ventilation is a must for any staining project. Staining your cabinets in an area with no airflow can cause symptoms including dizziness, lightheadedness, and nose and throat irritation. If you experience any of these symptoms, take a break immediately to get some fresh air. When you return, make sure that there’s enough ventilation in the room for the fumes to dissipate.
More dangerous than the fumes, however, is the risk of fire. Wood stain is extremely flammable and precautions must be taken at every step of the process to prevent ignition. Make sure that there are no flames anywhere near the staining area, even ones as small as lit cigarettes or pilot lights. When the job is complete, the rags used in the staining process must be immersed in a water-filled bucket before disposal to ensure that they don’t catch fire.
Though the risks might be intimidating, they can be easily addressed with a bit of care and forward planning. As long as you’re prepared, the danger to you and your loved ones is virtually non-existent.
The Staining Process
For the actual staining, you’ll need…
- Sandpaper, 120 and 220 grit
- An electric hand sander (optional)
- Wood conditioner
- Your choice of stain
- Finish
The first thing you’ll want to do is prepare your cabinet for staining. That means removing all the hardware, doors and faces from the cabinet; be sure to write down exactly where all of it was to make for easier reassembly once the process is complete. Putting the hardware in labeled plastic baggies is great way to keep them together, and setting aside the doors and faces to be stained last will help keep your work space free of clutter.
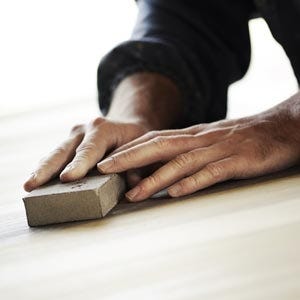
Now it’s time to sand. For the first sanding, you’re going to want sandpaper at 120 grit. Lightly sand the cabinets all over, and make sure to always do so in the direction of the wood grain. An electric hand sander can be helpful during this step but isn’t entirely necessary. Once you’ve sanded off the original stain, sand your cabinet again with 220 grit sandpaper; doing so will remove any scratches that may have resulted from the first sanding and give the wood a smoother finish.
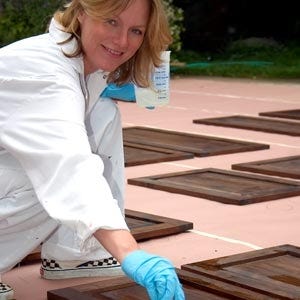
Next, apply wood conditioner - which will act as a sealant and help the stain go on evenly - with a brush or cloth. Give it five to fifteen minutes to dry before removing any excess conditioner with a clean cloth. Start staining within two hours of applying the conditioner by rubbing it in into the wood with a rag in a circular motion. Once the wood is coated, rub the rag along the grain of the wood to ensure a final, even coat. Remember that the stain will darken as it dries, and that more coats means a darker stain.
Finally, the finish. Some stains also act as a finish, so be sure to check the label before buying what might be an unnecessary can of finish. If you do buy it separately, the stain’s label can also tell you the kind of finish that it’s compatible with. Be sure to apply two coats in order to ensure long-lasting protection of your cabinet’s wood.
Conclusion
And that’s it! Stains come in so many colors these days that there’s certain to be one out there that’ll lend your cabinets the exact style you’re looking for. The only limit is your imagination...and your desire to put in a little extra work for that perfect look. Interested in learning more about cabinet-based DIY projects? Visit our blog or get in touch with one of our friendly customer service representatives today to find out about all the ways Lily Ann can help revitalize your kitchen.